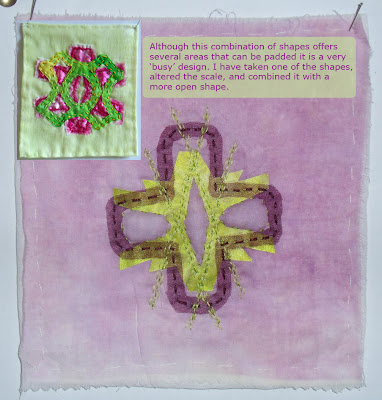
I have noticed that I am using the same shapes in different combinations to produce the samples in these last three chapters; some shapes offer more design possibilities than others and depending on elements needed, such as padding, some shapes are less suitable than others.
 |
| My preliminary drawings with possible shape and stitching combinations. |
I did think about using some of the same shape combinations from previous chapters in order to show a design progression; however in each chapter I have tried to select the best shape combinations to illustrate the particular exercise therefore the same combination doesn't always suit the additions of the next chapter. I have tried to show my thoughts with some of my selections.
My next sample comprises a painted calico background layer with a bonded shape overlayed with stitching in a shape taken from my cut and fold exercises.
The next sample comprises a painted polyester cotton fabric background, a simple bonded shape in a cotton fabric and a sheer chiffon bonded shape. Machine stitching has been used mimicking one of my cut and fold shapes then hand stitching has been added to frame the central oval shape which has been padded.
This next sample comprises a background layer of satin fabric, a bonded shape in shot silk fabric and the same shape in a bonded fabric, machine stitched radiating lines in zigzag stitch with additional straight stitching machined around the central diamond shaped area.
My last sample I have tried to make a more complex one. The background layer is a double layer - painted calico with painted muslin on top - this was to give enough body to the fabric for free machine stitching. 4 square shapes have been free machine stitched leaving a negative space between them in a cross shape. Squares of shot silk fabric have been applied on top of the machine stitching; a square of shot organza fabric placed on top to cover the area of all 4 small squares, these layers have then been stitched with a diagonal line across each small square shape then cut on one side revealing an outside triangle of free machine stitching. A small square of painted satin fabric has been placed on top of the organza and machine stitched 5mm from the outer edge then again 1cm outside this line to secure the organza fabric in a square shape. The centre of the satin fabric square has been cut out but the organza has simply been slashed with a cross shape then each corner has been folded out loosely and held with a single french knot hand stitch. Finally a large square of cotton fabric was placed over all layers, hand stitched with 3 staggered rows of running stitch then cut to create a frame. The central cross shape has been padded.
 |
| I like the contrast of textures in this sample, not just in the fabrics used but with the stitching and the frayed edges of the silk fabric. |
 |
| This close up shows the different textures and layers. |
I used muslin fabric as the final backing layer for all these samples - this was a little too light for some of the samples. If the area to be padded is substantially heavier than the backing fabric it is much more difficult to achieve a padded effect on the surface. Fabrics stiffened by the use of Bondaweb are also more difficult to pad. Some of the samples could have been left without an additional backing fabric as the background layer could have been slashed to allow padding. Where a backing layer is necessary calico fabric would be a better choice as it is a firm, medium weight fabric.


Hello Julie
ReplyDeleteI am liking seeing all of your works. The samples you have done in this module are great. we are doing the same sort of thing at the moment with the studio journal workshop that I am doing on Sharon B's blog Pintangle. Keep up the great work.
Your Friend Elizabeth